Quick Start | Please read the documentation carefully
Unboxing
By default, Standard Edition users will receive:
- HINATA * 1
- USB Type-C data cable * 1
- Mifare Classic 1k sak:0x08 blank card * 1
Lite Edition users will receive:
- HINATA Lite * 1
What to do
-1. A note on the HINATA Lite antenna
Since HINATA Lite uses an off-the-shelf RF antenna module, it may not be a perfect match for the current use case of placing cards directly on the reader. The optimal reading position for some cards is not when they are placed right against the reader, but rather a few centimeters higher. If you encounter very unstable issues when scanning some compatible cards, please first go to the HINATA Control Center to test the card reading stability, then appropriately raise the card a few centimeters when swiping in-game or use a non-metallic object of appropriate thickness as a cushion. Alternatively, you can use a copper foil sticker and apply a piece to the area on the back of the HINATA Lite that glows red. The specific size is recommended to be tested on the webpage. HINATA Lite units shipped after July 20, 2025, will come with a copper foil sticker of a suitable size.
0. Join the after-sales group & some notes
Join the after-sales group: 362419355
Feel free to ask any questions in the group. I can also provide remote assistance at a suitable time.
After receiving the card reader, you can first check the firmware version and update it to the latest version. See Firmware Update.
1. Connect to the computer
Connect HINATA to the computer using a USB Type-C data cable.
HINATA will light up yellow when powered on, and will gradually turn blue after a successful USB handshake with the computer.
HINATA Lite will have a constant red light on the back when powered on, please ignore it.
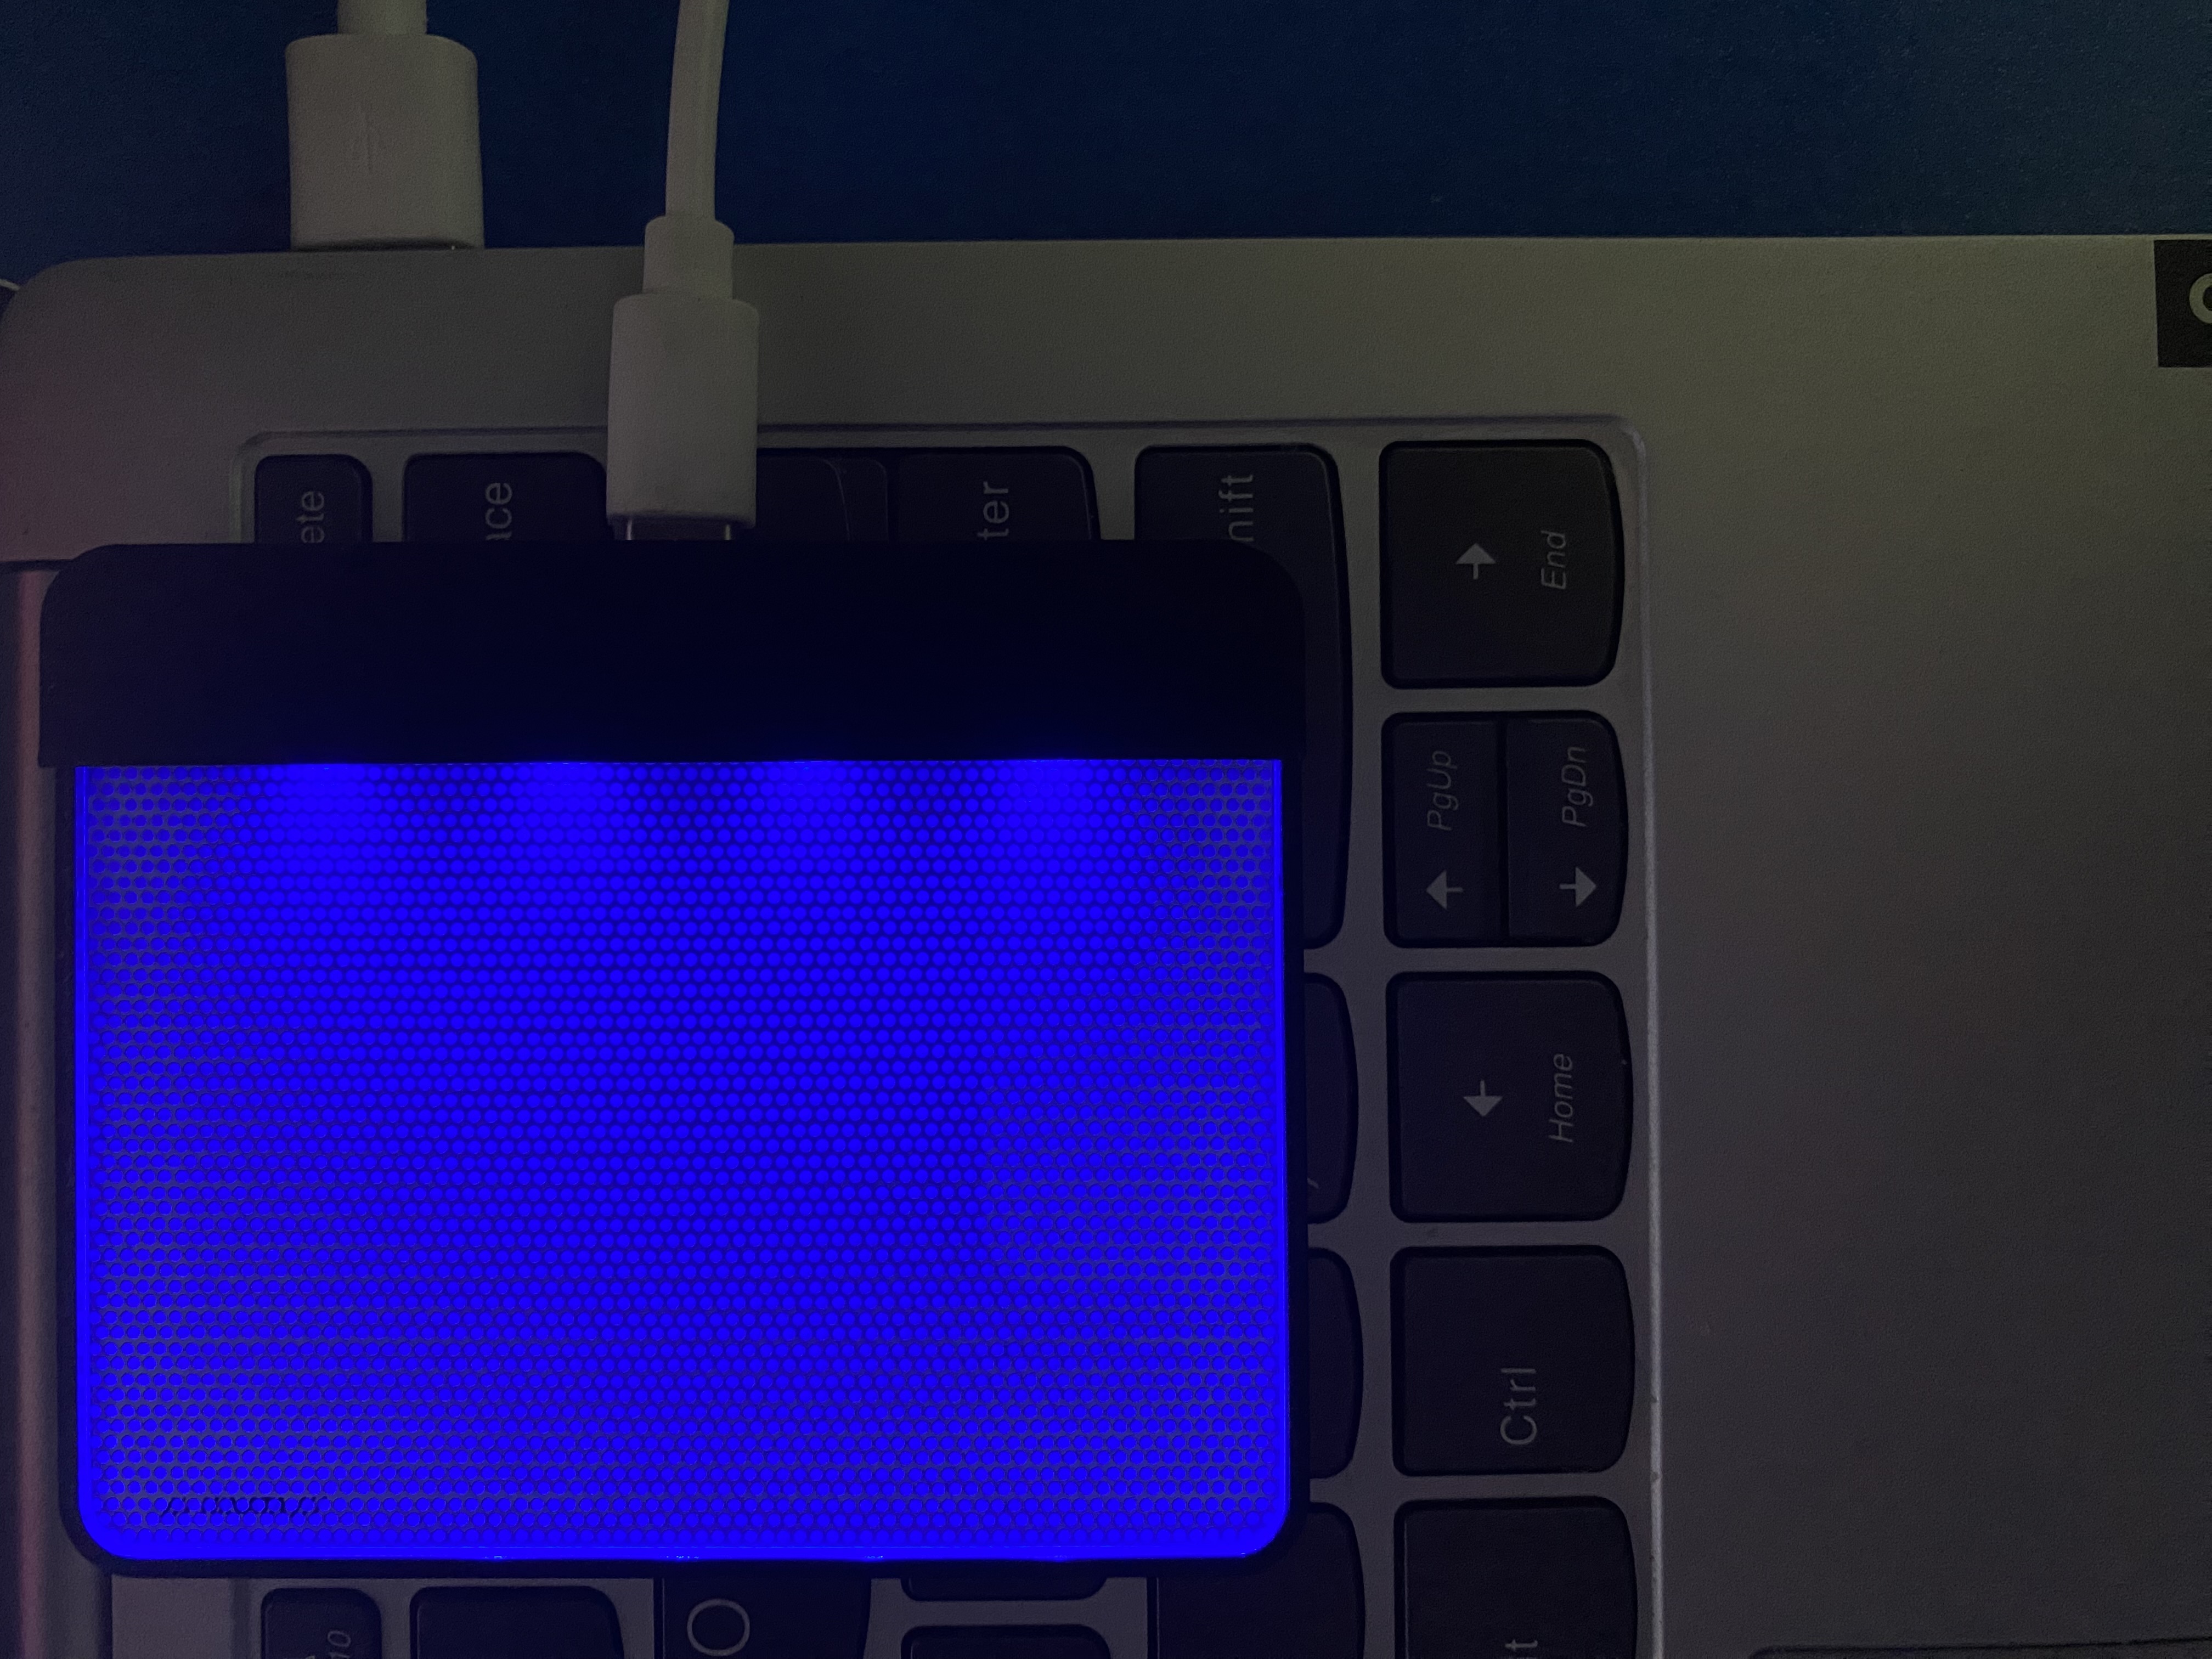
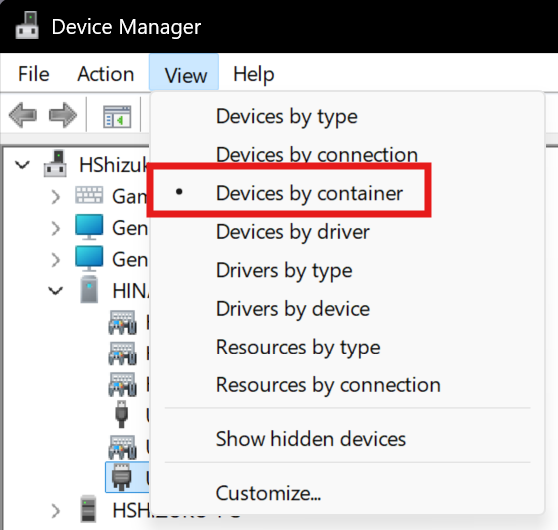
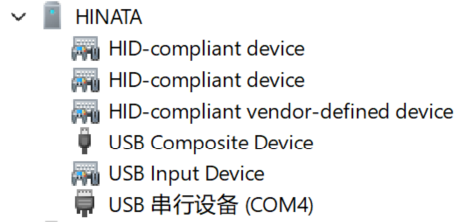
At this time, you should be able to see the HINATA device in the Windows Device Manager.
2. Write an Aime card number to the provided card
Only the standard edition comes with a card.
The white card needs to have a card number written to it before it can be used in SEGA games.
If you have your own Aime card, Banapass card, or Amusement IC card, and you don't want to use the provided white card, you can skip this step.
For writing methods, please see:
3. Start configuring the game
The configuration for SEGA games and KONAMI games can coexist.
(When adjusting the configuration for KONAMI games, you don't need to worry about whether the SEGA game port number is configured or not, the reader status will switch automatically)